Drawing and Labelling Science Diagrams the Exam-Ready Way

A science diagram is not a piece of art. It is a clear explanation drawn with lines, labels, and space. Examiners do not expect beautiful pictures, but they do expect a diagram they can read without guessing. Many pupils lose marks not because they do not know the science, but because their diagram is crowded, their label lines cross, or their labels are vague. The good news is that exam-ready diagrams follow a small set of habits that anyone can learn. Draw with a sharp pencil, keep lines clean and straight, label with short words, and leave room around the diagram. This article walks through those habits with practical steps you can use in class tests, homework, and board exams. For chapter practice alongside diagrams, look at the [solved notes](/books.html) and the [books page](/books.html).
Start with a Plan, Not a Pencil Stroke
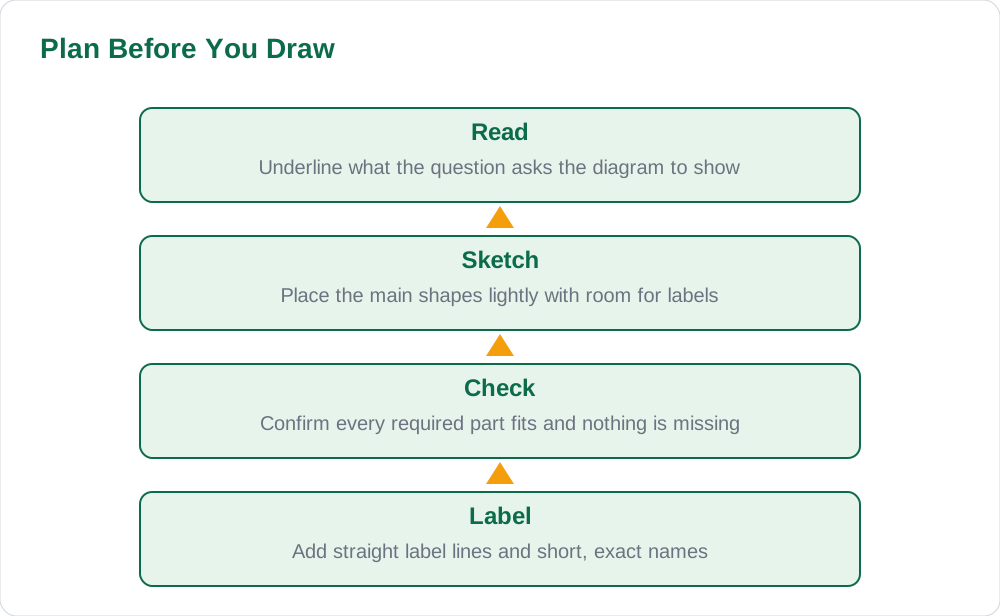
Before you draw, decide what the diagram must show. Read the question twice and underline the parts that must appear. If the question asks for a labelled diagram of a flower, the examiner expects the main parts and their names, not a decorative border or shading. If it asks for an electric circuit, the examiner expects the battery, bulb, wires, and switch in the right connections. A ten-second plan saves minutes of rubbing out later. Think about size first: the diagram should fill a sensible part of the page, large enough to label clearly but not so large that label lines run into the margin. Sketch the main shapes lightly, check that everything fits, and only then darken the final lines.
Planning also means choosing what to leave out. A diagram of a leaf does not need every vein drawn in detail, and a diagram of the water cycle does not need a whole landscape. Keep only the parts that explain the science. If a part is not needed for the answer, leaving it out makes the diagram clearer. Use the space around the diagram for labels rather than filling it with extra decoration. Pupils who plan first produce diagrams that look calm and organised, even when drawn quickly. That calm layout helps the examiner follow your thinking, which is exactly what a diagram is meant to do.
- Read the question twice and underline what must appear.
- Decide the size so labels fit without crowding the margin.
- Sketch lightly first, then darken only the final lines.
- Leave out decoration that does not explain the science.
Clean Lines and Correct Shapes
Exam-ready diagrams are drawn in pencil with firm, single lines. Avoid sketchy, repeated strokes that make the shape look fuzzy. For straight parts, use a ruler. For circles, use a compass or trace a round object lightly. For a circuit, use a ruler for every wire so the diagram looks tidy. If you make a mistake, erase it fully rather than drawing over it, because a double line confuses the reader. Keep the outline simple: a leaf can be one smooth shape, a flower can be a few clear petals, and a beaker can be a straight-sided shape with a flat base. Simple shapes drawn cleanly always beat complicated shapes drawn messily.
Shading should be light or absent. Heavy shading makes a diagram hard to read and can hide the lines underneath. If you need to show a difference, use light hatching or a clear label instead of dark colouring. Colour is usually not needed in a science exam diagram, and coloured pencils can smudge. Save colour for class posters where it helps, not for exam answers where clarity matters most. When you finish the outline, step back and ask whether someone who has not seen your textbook could still recognise each part. If the answer is no, simplify the shape before you add labels.
- Use one firm pencil line instead of many sketchy strokes.
- Use a ruler for straight lines and a compass for circles.
- Erase mistakes fully instead of drawing over them.
- Keep shading light or leave it out in exam diagrams.
Label Lines: Straight, Short, and Never Crossing
Label lines are the most common place where diagrams lose marks. Each label line should be straight, drawn with a ruler, and should end exactly on the part it names. Lines should not cross each other, and they should not pass through other parts of the diagram. The cleanest layout puts labels on the left and right sides of the diagram, with the label words lined up neatly outside the drawing. Leave a small gap between the end of the line and the label word so the text is easy to read. If two labels would cross, move the diagram, make it smaller, or move one label to the other side before you start writing.
Label words should be short and exact. Use one word or a short phrase that matches the textbook term, such as petal, filament, battery, or switch. Avoid long sentences on a label line, because they crowd the page and often contain extra errors. Check spelling carefully, because a misspelt label can cost marks even when the diagram is correct. Write labels in neat, horizontal handwriting, not sideways or curved. If you are unsure of a term, it is better to leave that one label out than to invent a name. You can still earn marks for the parts you label correctly, and a blank space is clearer than a guessed word.
- Draw every label line with a ruler, straight and uncrossed.
- End each line exactly on the part it names.
- Keep labels outside the diagram, lined up on the sides.
- Use short textbook terms and check the spelling.
Titles, Scale, and Neat Layout
Every diagram needs a short title above or below it that says what it shows. A title such as Diagram of a Flower or Simple Electric Circuit tells the examiner what to expect before they read the labels. Write the title in the same neat handwriting as the labels, and underline it lightly if your teacher expects that style. Below the diagram, you can add one line explaining what the diagram shows, but keep it short. The diagram itself should do most of the explaining. If the question asks for a sequence, such as the stages of a process, arrange the small drawings in order from left to right or top to bottom, and number them clearly.
Layout matters because a crowded page hides good work. Leave a margin around the diagram, and do not let labels run into the next answer. If your diagram needs more room, start it on a fresh part of the page rather than squeezing it into a corner. For comparisons, draw the two diagrams side by side at the same size so the difference is easy to see. For processes, leave equal space between stages. These small layout choices show that you are thinking about the reader, and they make your answer look organised even under exam pressure. More layout examples appear in the study blog.
- Give every diagram a short, clear title.
- Arrange sequences left to right or top to bottom and number them.
- Leave a margin so labels never run into the next answer.
- Draw compared diagrams at the same size, side by side.
Practise Habits That Build Speed and Accuracy
Good diagram habits come from short, regular practice, not from one long session before an exam. Choose one diagram from each chapter and redraw it from memory on a blank page, then compare it with the textbook version. Check three things: did you include every part, are the label lines straight and uncrossed, and are the labels spelt correctly. Redrawing from memory is harder than copying, but it shows what you really know. Over a few weeks, your hand will learn the shapes and your speed will improve without losing clarity. Keep a small set of your best diagrams in a notebook so you can revise them quickly before a test.
In the exam hall, manage your time. Read the question, plan the diagram, draw lightly, darken the final lines, then label. Do not spend so long on one diagram that you run out of time for written answers. If a diagram is worth a few marks, it deserves a few minutes, not half the paper. Practise with a timer at home so you learn how long a neat diagram really takes. When you finish, use the last minute to check labels, spelling, and whether any line crosses another. That quick check often saves marks. For more exam habits, see solved notes and the article on science experiments.
- Redraw one diagram per chapter from memory, then compare.
- Check parts, label lines, and spelling every time.
- Practise with a timer so exam diagrams stay quick and neat.
- Use the last minute to check for crossed lines or misspelt labels.
AI Help: Muse AI
Muse AI is Meta's personal AI assistant, and it can help you practise diagram labelling by quizzing you on the parts of a diagram and checking your label spellings.
Join Muse with invite code LTGSWD — in the Muse app, go to Settings > Redeem token and enter the code.
Disclosure: LTGSWD is the author's Muse invite code.
Muse AI does not give official STBB answers — always verify against your Sindh Textbook Board book and your teacher.
5 key points you must know
- Plan the diagram before drawing: size, parts, and label space.
- Use firm pencil lines, a ruler for straight lines, and erase mistakes fully.
- Draw straight label lines that end on the part and never cross.
- Use short, correctly spelt textbook terms for every label.
- Practise redrawing diagrams from memory to build speed and accuracy.
Frequently asked questions
Should science diagrams be drawn in pen or pencil?
Use pencil. Pencil lets you erase a mistake cleanly and keeps lines sharp. Pen makes a small error permanent and often leads to messy corrections. A sharp pencil with firm, single lines is the exam-ready choice.
Why do label lines matter so much?
Label lines show exactly which part each word names. If lines cross or end in the wrong place, the examiner cannot tell what you mean, even if the words are correct. Straight, uncrossed lines that end on the right part keep the meaning clear.
How long should a label be?
Keep it to one word or a short textbook phrase, such as filament or switch. Long sentences crowd the diagram and add chances for spelling errors. Put explanations in the written answer, not on the label line.
What if I forget the name of one part?
Leave that label out rather than inventing a name. You can still earn marks for the parts you label correctly. After the exam, check the textbook term and add it to your revision list so you remember it next time.
How can I make diagrams faster without making them messy?
Practise redrawing one diagram per chapter from memory with a timer. Planning the size and label space first saves rubbing out later. A short daily habit builds speed far better than one long session before the exam.
Solved notes — preview free
These guides work best with the solved exercises. Preview the solved notes free on this website — 119 solved notes for Classes 6–10 in Sindhi, Urdu, English and Arabic medium. Or browse the full solved notes catalogue for your class and medium. New solved notes are added regularly — check the catalogue for coming-soon books.